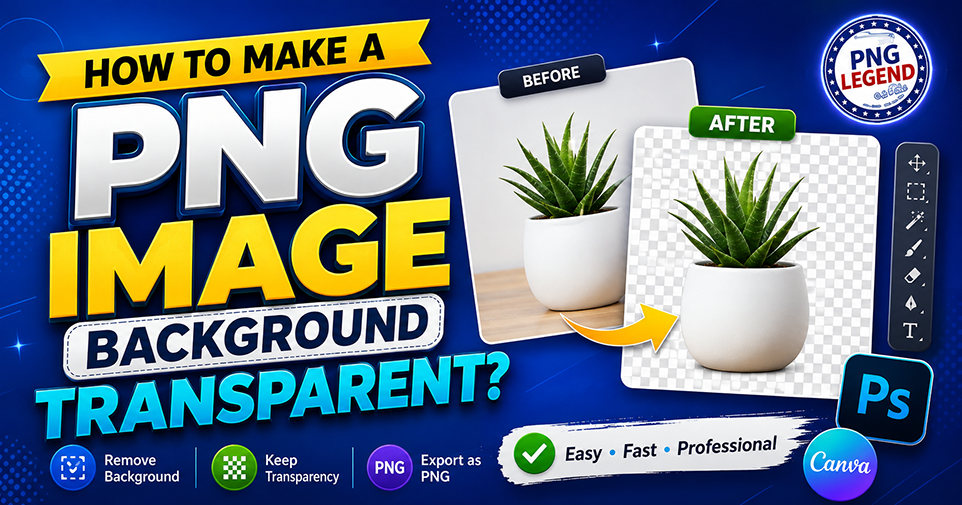
Have you ever found the perfect image for a logo, website, presentation, or social media design—only to discover that it has an unwanted white background?
That is where a transparent PNG becomes incredibly useful.
A PNG image with a transparent background allows you to place the subject over almost any background without seeing a white or coloured box around it. This makes transparent PNG images especially useful for graphic designers, website owners, marketers, content creators, and anyone working with digital graphics.
The good news is that making a PNG background transparent is easier than it may seem. You can do it with professional software such as Photoshop, browser-based design tools such as Canva, or automatic background-removal tools.
In this guide, we’ll explain several practical ways to make a PNG image background transparent while keeping the subject clean and the image quality intact.
What Is a Transparent PNG?
A transparent PNG is an image that contains transparent pixels instead of a solid background.
For example, imagine you have a product photo of a pair of shoes. If the original image has a white background, placing it on a dark website may leave an obvious white rectangle around the shoes.
With a transparent PNG, the background is removed, leaving only the shoes visible.
This makes PNG particularly useful for:
- Logos
- Product images
- Icons
- Social media graphics
- Website elements
- Illustrations
- Stickers
- Digital advertisements
- Presentation graphics
If you’re new to the PNG format, you can also read our guide What Is a PNG File and Why Do Designers Prefer It?
How to Make a PNG Background Transparent in Photoshop
Adobe Photoshop is one of the most popular choices for designers because it provides precise control over background removal.
Step 1: Open Your Image
Open Photoshop and import the image you want to edit.
For the best results, use an image with reasonably clear separation between the subject and the background.
Step 2: Unlock the Image Layer
If the image appears as a locked Background layer, click the lock icon to unlock it.
This allows you to edit the layer and remove unwanted areas.
Step 3: Remove the Background
Recent versions of Photoshop include automatic background-removal features that can identify the main subject.
You can also use selection tools such as:
- Object Selection Tool
- Quick Selection Tool
- Magic Wand Tool
- Select and Mask
For simple backgrounds, automatic selection can work surprisingly well.
For complicated images, manually refining the selection usually produces a cleaner result.
Step 4: Refine the Edges
This is an important step that beginners sometimes skip.
Look closely around:
- Hair
- Product edges
- Fingers
- Small objects
- Shadows
- Fine details
Remove unwanted background pixels and smooth rough edges where necessary.
A transparent PNG with a messy white outline can look worse than the original image.
Step 5: Export as PNG
Once you’re happy with the result, export the image as a PNG.
Make sure transparency is enabled during export.
Do not save it as JPEG if you need to preserve transparency because JPEG does not support transparent backgrounds.
How to Make a PNG Background Transparent in Canva
Canva is a popular option for users who don’t want to work with professional photo-editing software.
The general workflow is simple.
Upload your image to Canva, select the image, and use its background-removal feature if it is available in your Canva plan.
After removing the background, check the edges carefully.
Then download the image as PNG and make sure the option for a transparent background is enabled when available.
This method is particularly convenient for:
- Social media posts
- Marketing graphics
- Presentations
- Simple product graphics
- Website visuals
For complex images, however, you may still need more advanced editing tools for detailed edge cleanup.
How to Remove a Background Automatically
If you don’t have Photoshop or Canva, online background-removal tools can make the process much faster.
The basic workflow is usually:
Upload Image → Remove Background → Check Result → Download PNG
Automatic tools are particularly useful when you need to process an image quickly.
However, don’t simply download the result without checking it.
Automatic background removal can sometimes incorrectly remove parts of the subject or leave small pieces of the original background behind.
Always zoom in and inspect the edges before using the image professionally.
How to Make a White Background Transparent
A white background is often easier to remove than a complicated background.
If you’re using Photoshop, you can select the white area using tools such as the Magic Wand and then remove the selected pixels.
However, be careful when the subject itself contains white.
In these situations, use a more precise selection method and refine the edges manually.
How to Keep PNG Transparency While Editing
Removing the background is only half the job. You also need to make sure transparency remains intact when saving the image.
Here are a few things to check:
Use PNG
PNG supports transparency, making it a practical choice for transparent graphics.
Check the export settings
Some applications provide an option to include or exclude transparency during export.
Look for the checkerboard background
Many editing applications display transparency as a grey-and-white checkerboard pattern.
If you see that checkerboard behind your subject, it generally means those areas are transparent.
Open the exported file
After saving, open the final PNG and place it over a different coloured background.
This is a simple way to confirm that the transparency has actually been preserved.
How to Get Clean Edges Around a Transparent PNG
A good transparent PNG should look clean when placed on both light and dark backgrounds.
If you notice a thin white or dark outline around the subject, the original background may not have been completely removed.
You can improve the result by:
- Refining the selection
- Removing leftover background pixels
- Smoothing jagged edges
- Adjusting the mask
- Checking the image at 100% zoom
For professional design work, edge quality matters just as much as background removal.
Should You Compress a Transparent PNG?
Yes, you can—and in many cases, you should.
Transparent PNG files can become quite large, particularly when they contain high-resolution graphics, many colours, shadows, or detailed artwork.
After removing the background, consider optimizing the PNG before uploading it to your website.
However, make sure your optimization process doesn’t remove the transparency or noticeably damage the image.
If you’re interested in reducing PNG file size, read our guide:
How to Compress PNG Images Without Losing Quality or Transparency?
That article explains practical ways to optimize PNG files while maintaining their visual quality and transparency.
Why Transparent PNGs Are Useful for Websites
Transparent images give website designers much more flexibility.
A logo, product image, icon, or decorative element can be placed over different backgrounds without creating an unwanted rectangular box.
They are especially useful for:
- Website logos
- Product showcases
- Hero sections
- Buttons and icons
- Blog graphics
- E-commerce visuals
- Promotional banners
However, transparency doesn’t automatically make PNG the best format for every image.
The right format depends on the image type, required quality, transparency needs, and website performance.
For a broader comparison, see our article PNG vs JPG: Which Image Format Is Better for Websites?
Common Mistakes When Making PNG Backgrounds Transparent
Saving the image as JPG
JPG does not support transparency, so use PNG when transparency is required.
Not checking the edges
Small leftover background pixels can become very noticeable when the image is placed over a different colour.
Removing too much
Automatic background removal can sometimes delete parts of the actual subject.
Using unnecessarily large dimensions
A huge PNG may increase your website’s loading requirements. Resize and optimize it when appropriate.
Forgetting to check the final export
The editing software may show transparency correctly, but always inspect the exported file before publishing it.
Final Thoughts
Making a PNG image background transparent is a simple but extremely useful skill for anyone working with digital graphics.
Whether you use Photoshop, Canva, or an automatic background-removal tool, the basic process is the same:
Remove the background → Refine the edges → Preserve transparency → Export as PNG → Check the final image.
The most important thing is not simply removing the background. It’s producing a clean, professional-looking transparent PNG that works naturally on different backgrounds.
Once you get comfortable with the process, transparent PNGs can become a valuable part of your workflow—from website graphics and product images to logos, social media designs, presentations, and marketing materials.
Frequently Asked Questions
1. Can I make any PNG background transparent?
In most cases, yes. However, the difficulty depends on the image. A simple solid-colour background is usually much easier to remove than a busy or detailed background.
2. Does PNG support transparent backgrounds?
Yes. PNG supports transparency, which is one of the reasons it is widely used for logos, icons, illustrations, and other graphics that need transparent areas.
3. How do I make a white background transparent?
You can select and remove the white background using an image editor such as Photoshop. Be careful when the subject also contains white areas.
4. Can I make a background transparent without Photoshop?
Yes. Tools such as Canva and various online background-removal services can automate much of the process.
5. Why does my transparent PNG have a white outline?
A white outline usually means some background pixels remain around the subject. Refining the selection or mask can help clean up the edges.
6. Will a transparent PNG work on a dark background?
Yes. A properly created transparent PNG can be placed over both light and dark backgrounds. Always check the edges to make sure they look clean.
7. Can I compress a transparent PNG?
Yes. PNG files can be optimized to reduce file size while preserving transparency. The amount of reduction depends on the image.
8. Is PNG better than JPG for transparent images?
Yes. PNG is generally the appropriate choice when you need a transparent background because JPG does not support transparency.
2 Responses
This is an exceptionally well-written article, and I am truly impressed by your fantastic work.
thank you