Transparent PNG images can save graphic designers hours of editing by eliminating the need to remove backgrounds manually. From YouTube thumbnails and social media posts to product ads and creative posters, these ready-to-use assets make the design process faster and more flexible. In this beginner-friendly guide, you’ll learn how to use transparent PNGs professionally in Canva and Photoshop, blend them naturally with any background, and create visually engaging designs.
Transparent PNG images have become an essential part of modern graphic design. Whether you are creating social media posts, YouTube thumbnails, website banners, advertisements, posters, or product mockups, ready-to-use PNG cutouts can save a significant amount of time. Instead of manually removing backgrounds from every image, designers can quickly place transparent assets into their compositions and focus on creativity.
However, simply dragging a PNG onto a background does not always create a professional result. To make a PNG look realistic, you need to understand transparency, resolution, shadows, lighting, color matching, and layering. In this beginner-friendly guide, you will learn how to use transparent PNG images effectively in both Canva and Photoshop.
The Golden Rules of Using PNGs
Before adding PNG assets to your design, it is important to understand a few basic rules. These simple steps can help you avoid common design mistakes and improve the overall quality of your work.
What Makes a PNG “Truly Transparent”?
Not every image that appears to have a checkerboard background is actually transparent. A truly transparent PNG contains an alpha channel, which means there are no visible pixels behind the main subject.
For example, if you download a transparent PNG of a person and place it on a blue, black, or colorful background, only the person should appear. The new background should be visible around the subject.
However, some images contain a fake checkerboard pattern that has been permanently added to the image. When you place such an image into Canva or Photoshop, the gray-and-white checkerboard will still be visible.
A quick way to check transparency is to place the image over a bright or dark-colored background. If you see a white box, black box, or checkerboard pattern, the file is not truly transparent.
Always check your PNG files before using them in a final design. High-quality transparent PNG assets will save editing time and help create cleaner, more professional compositions.
Resolution & Aspect Ratio
Another important rule is to maintain the correct resolution and aspect ratio of your PNG image.
Stretching an image horizontally or vertically can make people, products, logos, and objects look distorted. Instead of dragging only one side of the image, resize it from the corner handles to maintain its original proportions.
In Canva, resizing from the corner is generally the easiest way to keep the image proportional. In Photoshop, use Free Transform and make sure the proportions remain constrained according to your version and settings.
Avoid enlarging a small PNG too much. A low-resolution image can become blurry, pixelated, or soft when scaled beyond its original quality.
Best practice: Always choose a PNG with enough resolution for your final design size.
Step-by-Step: How to Blend PNG Cutouts Naturally
One of the biggest differences between an amateur and professional design is how naturally the cutout blends with the background.
A PNG should look like it belongs in the scene—not like it was simply pasted on top.
Adding Natural Drop Shadows
Shadows are essential for making objects feel grounded.
Without a shadow, a product, person, or object may appear to be floating in the air. Before adding a shadow, look at the lighting direction in your background.
For example, if the light source is coming from the upper-left side, the shadow should generally fall toward the lower-right side.
In Photoshop, you can add shadows using Layer Styles such as Drop Shadow. Adjust the opacity, angle, distance, spread, and blur according to the size and position of the object.
For a realistic effect, avoid using extremely dark shadows. Real shadows often have soft edges and gradually fade into the background.
In Canva, select the PNG and explore the available shadow effects under the image editing options. Adjust the transparency, blur, direction, and distance where available to match your composition.
The goal is simple: the shadow should support the object, not overpower it.
Color Matching & Lighting Balance
A common problem occurs when a PNG and background were created under completely different lighting conditions.
Imagine placing a cool, blue-toned product PNG on a warm orange sunset background. Even if the cutout is perfect, the final design may look unnatural.
To fix this, adjust the PNG’s colors and brightness to match the overall environment.
In Photoshop, tools such as Curves, Levels, Hue/Saturation, and Color Balance can help you adjust highlights, shadows, contrast, and color temperature.
In Canva, use the Adjust tool to modify settings such as brightness, contrast, saturation, highlights, shadows, and warmth.
First, study the background:
- Is it bright or dark?
- Is the lighting warm or cool?
- Where is the main light source?
- Are the shadows strong or soft?
Then adjust your PNG to fit the same visual environment.
Feathering and Softening Edges
Some PNG cutouts have rough, hard, or pixelated edges. This is especially common around hair, fur, leaves, smoke, and other detailed objects.
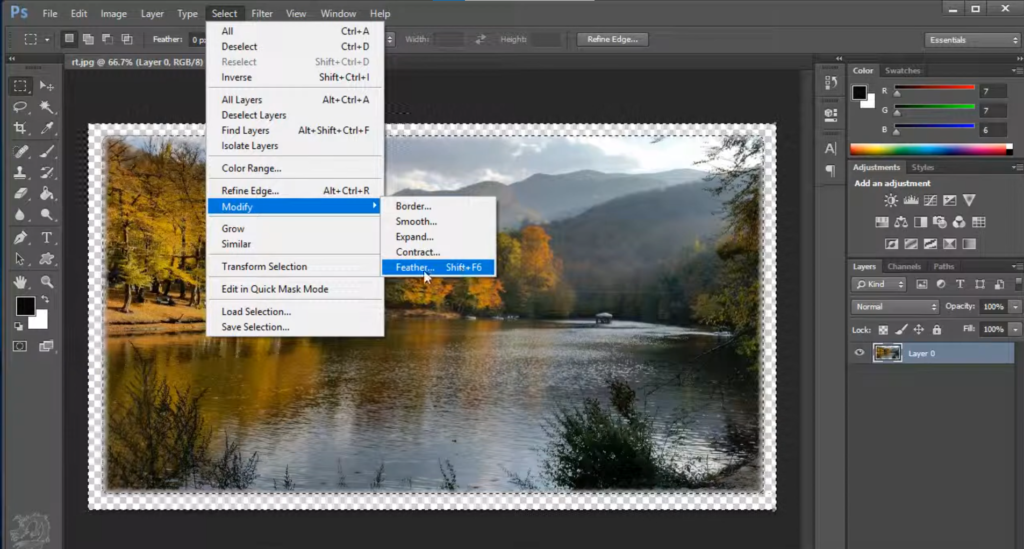
In Photoshop, the Select and Mask workspace can help refine edges. Tools such as Smooth, Feather, and Shift Edge can make a cutout blend more naturally.
Using a Layer Mask is often better than permanently deleting pixels because it allows you to make changes later.
If an image has a visible white or dark outline around its edges, you may need to remove color fringing or slightly soften the edge.
The cleaner the cutout, the more realistic your final composition will look.
Creative Use-Cases for PNG Assets
Transparent PNG assets can be used for much more than simply placing an object on a background. With creative layering, they can add depth, energy, and visual interest to almost any design.
Lighting & Glow Overlays
Lighting PNGs such as lens flares, neon glows, light streaks, and glowing particles can make YouTube thumbnails, posters, gaming graphics, and promotional designs more visually engaging.
For example, you can place a subtle glow behind a product to separate it from the background. A lens flare can help create a cinematic atmosphere, while neon effects can make text or objects stand out.
The key is moderation. Too many lighting effects can make a design look cluttered or artificial.
If your website offers transparent assets, this is a great section to internally link to categories such as Lighting PNGs, Lens Flare PNGs, Neon Glow PNGs, and Light Effects PNGs.

Atmospheric Elements
Smoke, fog, dust, clouds, sparks, and particle PNGs are excellent tools for adding depth to a composition. Instead of placing all effects behind the main subject, try layering some elements in front and some behind. For example:
Background → Fog Layer → Main Subject → Foreground Smoke or Particles
This technique creates a sense of distance and makes the design feel more cinematic and three-dimensional. You can also use atmospheric PNGs in posters, gaming banners, movie-style artwork, and dramatic social media creatives.
Relevant internal links can point to categories such as Smoke PNGs, Fog PNGs, Dust PNGs, and Particle PNGs.

Product Mockups & Social Media Ads
Transparent product PNGs are extremely useful for e-commerce banners and social media advertisements.
Instead of placing a product on a plain background, create a complete visual environment around it. Add a soft ground shadow, abstract shapes, lighting effects, reflections, or subtle decorative elements.
For example, a skincare product can be placed on a soft gradient background with leaves and water droplets. A technology product can use glowing lines and futuristic shapes.
Make sure the product remains the main focus of the composition.
This section is ideal for linking to your Product PNG, Product Cutout, E-commerce PNG, and Advertisement Assets categories.

Typography Framing
Transparent PNG elements can also create interesting typography effects.
Try placing some elements behind your headline and others in front of it. For example, floating flowers, leaves, 3D shapes, or abstract objects can partially overlap the text.
This creates a layered, dimensional appearance.
However, always protect readability. The decorative elements should frame the message rather than hide it.
Common Mistakes to Avoid
Using Low-Resolution PNGs
A blurry or pixelated PNG can reduce the quality of an otherwise excellent design. Always use high-resolution assets appropriate for your final output size.
Over-Sharpening Images
Trying to fix a low-quality PNG by aggressively sharpening it can create unnatural edges and visible noise. Whenever possible, start with a better-quality image.
Ignoring Shadows and Lighting
Simply pasting an object onto a background without matching shadows, direction, brightness, and color temperature is one of the most common design mistakes.
Always make the PNG respond to the visual environment around it.
Using Extremely Large File Sizes
Large PNG files can slow down websites, presentations, and design workflows. Before uploading images to your website, resize them to appropriate dimensions and optimize them for faster loading.
A good balance between image quality and file size can improve both user experience and website performance.
Frequently Asked Questions
Q: Why does my downloaded PNG have a black or white background?
The image may not actually be transparent, or the software you are using may display transparency differently. Place the image over a colored background to check whether the background is truly transparent.
Q: How do I change the color of a transparent PNG in Photoshop?
For simple icons or single-color PNG elements, you can use Color Overlay, Hue/Saturation, or adjustment layers. For more complex objects, selective color adjustments and masks provide greater control.
Q: Which is better for logo design: PNG or SVG?
SVG is generally better for logos because it can be scaled to different sizes without losing quality. PNG is useful when you need a transparent raster version for websites, presentations, social media, or other digital designs.
Q: Can I use transparent PNG images in Canva?
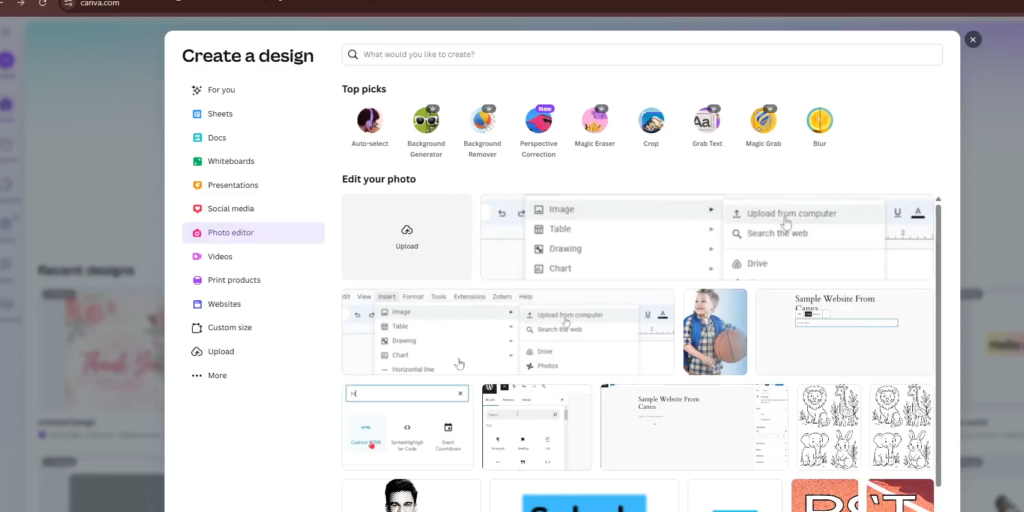
Yes. You can upload transparent PNG images directly into Canva and place them over any background. For the best results, maintain image quality and adjust shadows, colors, lighting, and positioning to match the overall design.
Final Thoughts
Transparent PNG images can make graphic design faster, easier, and more creative. But professional results require more than simply placing a cutout on a background.
By understanding transparency, maintaining resolution, matching lighting and colors, adding realistic shadows, softening rough edges, and using creative layering techniques, you can transform simple PNG assets into high-quality visual designs.
Whether you use Canva for quick and easy projects or Photoshop for detailed editing, these techniques will help you create better YouTube thumbnails, posters, social media graphics, product advertisements, and marketing visuals.
Start experimenting with different PNG elements, lighting effects, atmospheric overlays, and layered compositions—and turn simple transparent images into designs that look polished, realistic, and professionally created.
One Response
Your article is exceptionally informative and wonderfully written—keep up the amazing work!