PNG files are one of the most popular image formats for web designers, graphic designers, developers, marketers, and content creators. They are especially useful when we need transparent backgrounds, sharp graphics, logos, icons, screenshots, or high-quality digital artwork.
But there is an important trade-off that every designer should understand: PNG file size vs image quality.
A PNG can look incredibly sharp while taking up several megabytes of storage. On the other hand, aggressive optimization can reduce file size significantly without visibly affecting quality—if we choose the right settings and workflow.
So, how large should a PNG actually be? Does a larger PNG always mean better quality? And how can we reduce PNG file size without making the image look blurry?
Let’s explore the answers.
What Determines PNG File Size?
PNG file size is influenced by several factors, not simply the physical dimensions of an image.
The most important factors include:
- Image dimensions
- Color depth
- Number of colors
- Transparency
- Image complexity
- Compression efficiency
- Metadata
- Optimization method
For example, a simple 1200 × 630 PNG containing a flat background and a few text elements may be surprisingly small. A photographic or highly detailed 1200 × 630 PNG can be considerably larger.
This happens because PNG uses lossless compression. Instead of throwing away image information to achieve a smaller file, PNG compression attempts to represent the same visual information more efficiently.
A Simple Question for Designers
If two PNG images have exactly the same dimensions, but one file is five times larger, does that automatically mean the larger file looks better?
Not necessarily.
The difference may simply come from inefficient compression, unnecessary metadata, excessive color information, or the complexity of the artwork.
PNG File Size vs Image Quality: What’s the Difference?
The relationship between file size and quality is often misunderstood.
With a lossless PNG, saving or compressing the image generally does not reduce its pixel-level image quality in the way JPEG compression can. This makes PNG particularly useful for graphics where sharp edges and transparency matter.
However, file size can still become a problem.
A large PNG can:
- Slow down website loading
- Increase bandwidth usage
- Consume more storage
- Make downloads slower
- Affect mobile browsing experiences
- Increase page weight
This is particularly important for websites serving users across the United States, United Kingdom, Canada, and Singapore, where visitors may access websites using everything from high-speed broadband to mobile networks.
The goal is therefore not simply to create the highest-quality PNG possible.
The better goal is to create the smallest PNG that still provides the visual quality we actually need.
Does a Larger PNG Mean Better Image Quality?
No.
A larger PNG does not automatically contain better visual quality.
Consider two identical 2000 × 2000 PNG images. One is 3 MB and the other is 800 KB. If both contain the same visual information and the smaller file has been properly optimized, the difference may be virtually impossible to notice.
This is why designers should evaluate images visually rather than judging quality by file size alone.
What Should We Look For?
When comparing two PNG files, examine:
- Edge sharpness
- Fine details
- Text clarity
- Transparency quality
- Color accuracy
- Gradients
- Compression artifacts
- Pixelation at intended display size
If both images look equally good at their intended size, why would we make visitors download the larger file?
That is where PNG optimization becomes valuable.
Why PNG Is Usually Larger Than JPEG
One of the most common questions designers ask is why a PNG is often much larger than a JPEG.
The answer is primarily related to compression technology and intended use.
PNG uses lossless compression. JPEG generally achieves much smaller file sizes by using lossy compression, which removes some visual information.
JPEG is often excellent for:
- Photographs
- Travel images
- Product photography
- Background photos
- Realistic images with many colors
PNG is often better for:
- Logos
- Icons
- Illustrations
- Screenshots
- Text-heavy graphics
- UI elements
- Images requiring transparency
- Digital graphics with sharp edges
For example, converting a photograph to PNG may dramatically increase its file size without providing a meaningful benefit.
Would we really want a 5 MB PNG when a carefully optimized JPEG could deliver similar visual quality at a fraction of the size?
Usually, no.
How Image Dimensions Affect PNG File Size
Image dimensions are one of the biggest contributors to file size.
A PNG measuring 4000 × 4000 pixels contains far more pixel information than a PNG measuring 1000 × 1000 pixels.
If an image is being displayed at only 500 × 500 pixels on a website, uploading a 4000 × 4000 PNG may be unnecessary.
This is why we should always consider the actual display dimensions.
Example
Suppose a website displays an image at approximately 600 × 600 pixels.
Uploading:
4000 × 4000 PNG → potentially excessive
may provide little practical benefit compared with:
1200 × 1200 PNG → more appropriate
The exact optimal size depends on the website, display density, design requirements, and intended use.
For more guidance, see our related article:
[Internal Link Placeholder: PNG Image Size Guide: Best Dimensions for Web & Social Media]
Transparency Can Increase PNG File Size
One of PNG’s biggest advantages is its ability to support transparency.
Transparent PNGs are extremely useful for:
- Logos
- Product cutouts
- Decorative elements
- Social media graphics
- Website overlays
- Stickers
- Icons
- Digital design resources
However, transparency can contribute to file complexity.
An image containing thousands of partially transparent pixels can require more information than a simple image with either fully transparent or fully opaque areas.
This becomes especially relevant for soft shadows, glowing effects, smoke, glass effects, gradients, and semi-transparent artwork.
A designer downloading a transparent PNG should therefore consider not only the visible artwork but also how much transparency information the file contains.
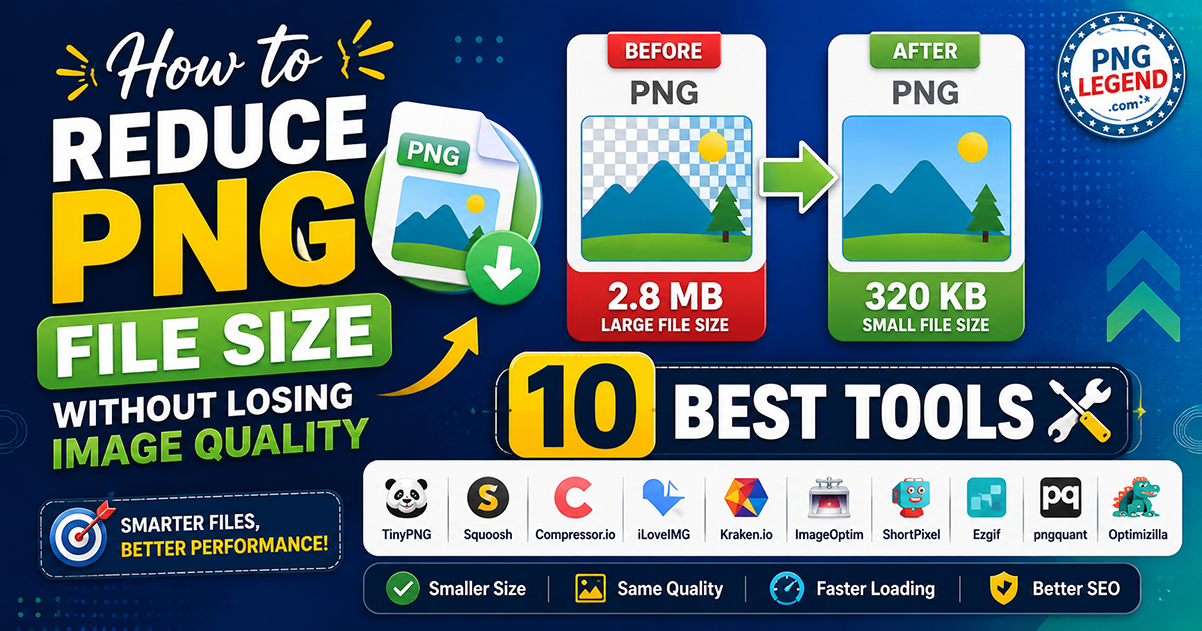
10 Best PNG Compressor Websites to Reduce File Size Without Losing Quality
When we need to reduce a PNG file size while keeping the image looking sharp, choosing the right compression tool is important. Different tools use different optimization methods, so we should always compare the before-and-after image quality rather than focusing only on the percentage of file-size reduction.
Here are 10 well-known PNG compression and optimization tools worth considering:
1. TinyPNG
TinyPNG is one of the most popular online image compression services. It uses intelligent compression and color optimization to significantly reduce PNG file sizes while keeping visual changes difficult to notice. TinyPNG also removes unnecessary metadata and maintains PNG transparency.
Best for: Web designers, bloggers, website owners, and everyday PNG compression.
2. Squoosh
Squoosh is a browser-based image compression tool associated with Google Chrome Labs. It provides detailed control over image compression and processes images locally in the browser, meaning the image does not need to be sent to a server for compression.
Best for: Designers and developers who want more control over compression settings.
3. ImageOptim
ImageOptim is particularly popular among Mac users and can optimize PNG files using several compression technologies. Its lossless optimization option can preserve the exact pixels while reducing unnecessary file data.
Best for: Professional designers and Mac users who want local image optimization.
4. Kraken.io
Kraken.io provides both lossy and lossless optimization modes. Its lossless mode is designed to reduce file weight without altering individual pixels, making it useful when preserving the original visual information is important.
Best for: Websites, developers, agencies, and users who need multiple optimization options.
5. Compressor.io
Compressor.io allows users to choose between lossy and lossless compression. It is designed to reduce image file sizes while maintaining high visual quality and provides a before-and-after comparison.
Best for: Quick online compression and comparing file size against visual quality.
6. iLoveIMG
iLoveIMG supports PNG compression along with several other image formats. Its compression tool aims to reduce file size while maintaining the best possible quality and also supports batch image processing.
Best for: Beginners, bloggers, and users who need to compress multiple images.
7. ShortPixel
ShortPixel offers several optimization levels, including Lossy, Glossy, and Lossless. Its Lossless mode produces pixel-by-pixel identical images, while the other modes can provide greater file-size savings with varying levels of visual compression.
Best for: WordPress websites, bloggers, photographers, and website owners.
8. EZGIF PNG Compressor
Although EZGIF is particularly well known for GIF tools, it also provides a dedicated PNG and APNG compressor. Its lossless OxiPNG method rewrites PNG data more efficiently and can remove unnecessary metadata without changing the image pixels.
Best for: PNG, APNG, GIF, and other web-focused image optimization tasks.
9. pngquant
pngquant is a powerful PNG compression utility designed for developers and advanced users. It uses lossy color quantization to dramatically reduce PNG file sizes while preserving transparency and maintaining high visual quality.
Best for: Developers, advanced users, and automated image-processing workflows.
Important: pngquant is primarily a lossy PNG compressor, so it should not be described as a strictly lossless tool.
10. Adobe Express
Adobe Express provides an online PNG compression tool with a slider that allows users to balance file size and image quality. This makes it useful when we want more control over the quality-versus-size trade-off.
Best for: Designers who already use Adobe’s creative tools and want compression within a broader design workflow.
Which PNG Compressor Should We Use?
There isn’t one perfect compressor for every PNG.
For quick online compression, TinyPNG and iLoveIMG are convenient choices.
For more control, Squoosh is worth trying.
For strict lossless optimization, Kraken.io, ImageOptim, ShortPixel’s Lossless mode, and EZGIF’s OxiPNG option are better examples.
For advanced developers, pngquant can provide substantial reductions when some controlled color loss is acceptable.
The best approach is to compress the same PNG using two or three tools and then compare:
- File size
- Text sharpness
- Edge quality
- Color accuracy
- Transparency
- Visible artifacts
If two compressed files look virtually identical, choosing the smaller file is usually the more practical option.
A Quick Comparison
| Tool | PNG Support | Lossless Option | Best For |
|---|---|---|---|
| TinyPNG | Yes | Quality-focused optimization | Beginners & websites |
| Squoosh | Yes | Depends on codec/settings | Advanced control |
| ImageOptim | Yes | Yes | Mac users |
| Kraken.io | Yes | Yes | Professional optimization |
| Compressor.io | Yes | Yes | Quick online compression |
| iLoveIMG | Yes | Quality-focused | Beginners & batch work |
| ShortPixel | Yes | Yes | WordPress |
| EZGIF | Yes | Yes, OxiPNG | PNG/APNG optimization |
| pngquant | Yes | No — primarily lossy | Developers |
| Adobe Express | Yes | Not strictly lossless | Designers |
————————————————————————————
How to Reduce PNG File Size Without Losing Quality
The best PNG optimization workflow starts before compression.
1. Use the Correct Dimensions
Do not export a 5000-pixel-wide image if the website only needs it at 1000 pixels.
Reducing unnecessary dimensions can dramatically reduce file size.
2. Remove Unnecessary Metadata
PNG files can contain metadata such as:
- Software information
- Creation details
- Color profiles
- Comments
- Other technical information
For web images, some metadata may not be necessary.
Removing unnecessary metadata can make files slightly smaller without affecting the visible artwork.
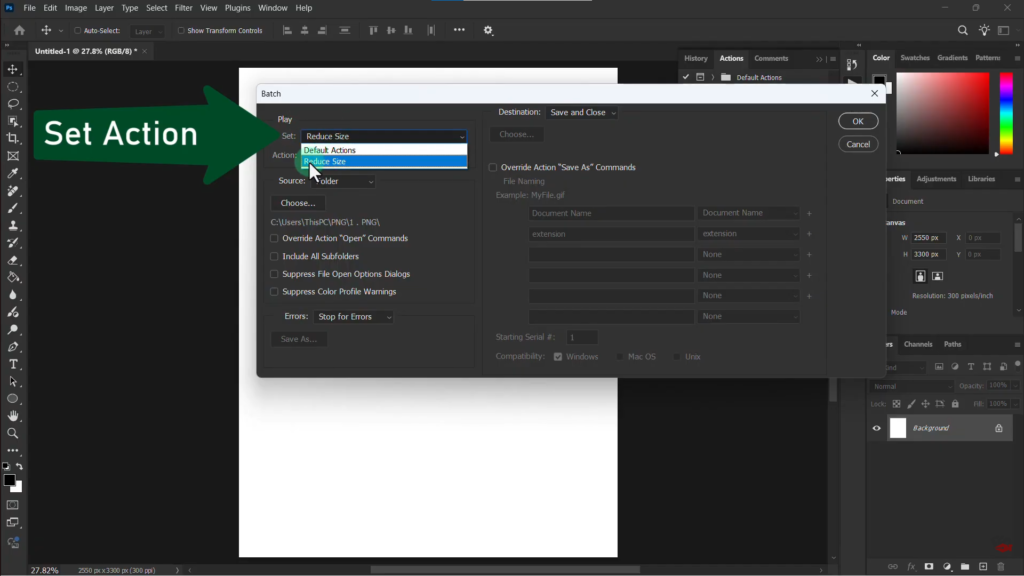
3. Optimize PNG Compression
PNG optimization tools can analyze the image and rearrange its data more efficiently.
Because PNG compression is lossless, properly optimized files can often become smaller without visibly reducing image quality.
4. Reduce Unnecessary Colors
Not every PNG needs millions of colors.
A simple icon containing only a few colors does not necessarily need the same color depth as a complex illustration.
For suitable artwork, reducing the color palette can produce significant savings.
5. Avoid Using PNG for Every Image
One of the easiest optimization mistakes is using PNG simply because it is considered a “high-quality” format.
Format selection should depend on the content.
Photograph? Consider JPEG or WebP.
Transparent logo? PNG may be ideal.
Simple vector-style graphic? Consider SVG where appropriate.
Modern web image? WebP or AVIF may provide better compression depending on the situation.
PNG Quality for Websites: What Should We Aim For?
For websites, the best image is not necessarily the largest or highest-resolution image.
We should aim for a practical balance between:
Visual quality + appropriate dimensions + efficient file size + correct format.
For example, a website logo does not need to be several megabytes.
Likewise, a detailed downloadable design asset may reasonably be larger because users expect a higher-resolution resource.
The intended purpose matters.
A Useful Rule
Before exporting a PNG, ask:
Where will this image be displayed, and at what size?
Then choose the dimensions accordingly.
This simple question can prevent a huge amount of unnecessary file weight.
PNG File Size Recommendations for Different Uses
There is no universal PNG file-size limit, but practical targets can help.
| Use Case | Recommended Approach |
|---|---|
| Website logo | Keep dimensions appropriate to display size |
| Website icon | Use small dimensions or SVG where suitable |
| Social media graphic | Export according to platform dimensions |
| Transparent product image | Use sufficient resolution without excessive pixels |
| Blog image | Match the site’s display width |
| Screenshot | Keep readable text while removing unnecessary dimensions |
| Downloadable design asset | Prioritize source quality while optimizing compression |
| UI element | Use the smallest dimensions that preserve sharpness |
These are guidelines rather than strict rules. The correct file size depends on the image itself.
PNG Compression: Lossless vs Lossy
This distinction is extremely important.
Lossless PNG Compression
Lossless compression reduces the amount of storage required while preserving the original image information.
This is ideal when we need to maintain:
- Sharp text
- Exact graphics
- Transparent areas
- Clean edges
- Original visual details
Lossy Image Compression
Lossy compression removes some information to achieve substantially smaller files.
This approach is commonly associated with formats such as JPEG.
For photographs, this can be an excellent trade-off. For logos, screenshots, and graphics containing sharp text, aggressive lossy compression may produce visible artifacts.
How Much PNG Quality Do We Actually Need?
This is where designers should think about purpose rather than perfection.
A PNG intended for a downloadable design resource may need significantly more detail than a small website thumbnail.
Similarly, an image displayed on a high-resolution screen may benefit from additional resolution compared with a tiny icon.
Instead of asking:
“How can we make this image the highest quality?”
ask:
“What is the highest quality the viewer can actually benefit from?”
That change in thinking can lead to faster websites and better-performing digital content.
Common PNG Optimization Mistakes
Using Huge Dimensions
Exporting every image at maximum resolution wastes storage and bandwidth.
Using PNG for Photographs
PNG is not automatically the best choice simply because it is lossless.
Ignoring Mobile Users
A large desktop-oriented PNG can become unnecessarily heavy on mobile connections.
Compressing Without Checking the Result
Optimization should always be followed by a visual inspection.
Keeping Unnecessary Transparent Areas
Large empty transparent regions can increase dimensions without adding useful content.
Assuming File Size Equals Quality
A 4 MB PNG is not automatically better than a 900 KB PNG.
How Designers Can Build a Better PNG Workflow
A practical workflow can look like this:
Create → Crop → Resize → Choose Format → Optimize → Inspect → Publish
First, create the artwork at an appropriate working resolution.
Next, crop unnecessary areas and resize the image according to its final purpose.
Then select PNG only when its advantages are useful.
After exporting, optimize the PNG using a reliable compression workflow.
Finally, inspect the optimized file at its actual display size.
This final step is important because an image that looks perfect at 400% zoom may provide absolutely no additional benefit when displayed at 600 pixels wide.
PNG File Size vs Quality: The Bottom Line
The relationship between PNG file size and image quality is not simply “bigger is better.”
PNG’s lossless nature makes it an excellent choice for graphics where sharpness, transparency, and detail matter. However, unnecessarily large dimensions, excessive color information, complex transparency, and inefficient compression can make PNG files much heavier than necessary.
The best approach is to create images that are appropriate for their intended use.
For web designers, that means choosing sensible dimensions, optimizing compression, removing unnecessary data, and selecting the right image format.
For designers creating downloadable PNG resources, it means preserving enough resolution and detail to make the asset genuinely useful while avoiding unnecessary file bloat.
And perhaps the most important question is this:
If your visitors cannot see the difference, why make them download the extra megabytes?
That is the core principle behind smart PNG optimization.
Frequently Asked Questions About PNG File Size and Image Quality
1. Does a larger PNG file mean better quality?
No. A larger PNG does not necessarily have better visual quality. File size can increase because of image dimensions, color information, transparency, metadata, or inefficient compression.
2. Does compressing a PNG reduce image quality?
With properly performed lossless PNG compression, visible image quality can remain unchanged. The compression process makes the file’s data more efficient rather than intentionally removing visual information.
3. What is a good PNG file size for a website?
There is no universal limit. The ideal size depends on the image dimensions and purpose. For website graphics, we should aim for the smallest file that provides the required visual quality.
4. Why are PNG files sometimes so large?
PNG files can become large because of high dimensions, complex artwork, millions of colors, transparency, gradients, and other image data.
5. Is PNG better than JPEG for image quality?
Not universally. PNG is excellent for graphics, transparency, screenshots, and sharp edges. JPEG is often more efficient for photographs and other complex photographic images.
6. Can we reduce PNG size without losing quality?
Yes. Lossless optimization, appropriate dimensions, removal of unnecessary metadata, and suitable color reduction can often reduce PNG file size without a visible quality loss.
7. Should we use PNG for website images?
PNG is a good choice when transparency or lossless graphics are important. For photographs and many general-purpose web images, other formats may provide better compression.
8. Does PNG resolution affect file size?
Yes. Increasing the width and height increases the amount of pixel information and can substantially increase the file size.
Final Takeaway
Good PNG optimization is not about making every file tiny. It is about eliminating unnecessary file weight while preserving the quality the viewer actually needs.
When we understand the relationship between PNG file size, dimensions, transparency, compression, and image quality, we can create faster websites, easier-to-download design resources, and more efficient digital graphics.
For designers, the goal is simple:
Keep the quality. Remove the waste.
One Response
very nice article, keep it up